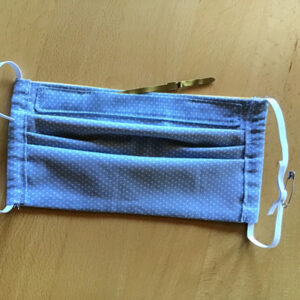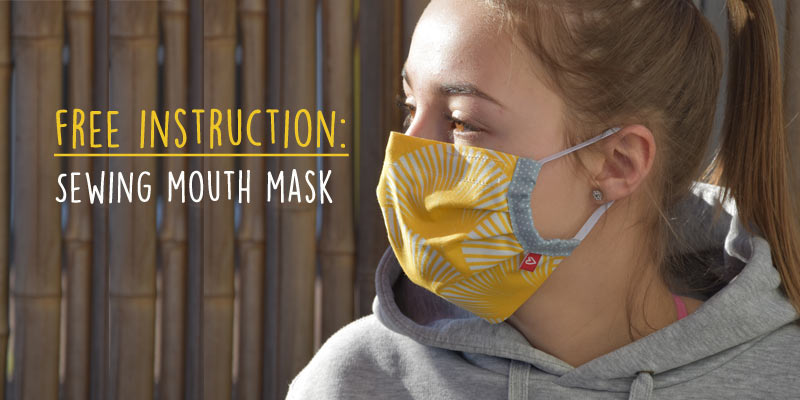
Today we have a free instruction for a sewn mouth mask. This can be very helpful for people with allergies and health problems. But it is also indispensable in times of corona crisis. It is not 100% protection against bacteria and viruses, but it certainly helps to reduce the risk of droplet infection. With our instructions you can also sew this washable mouth mask. On the inside above the nose, a metal strip or wire can be inserted into the sewn-on fabric pocket for better fixation.
Material
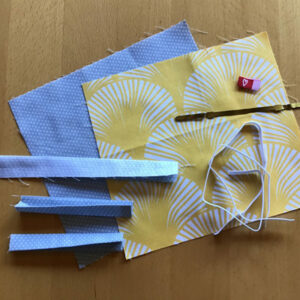
1 outer fabric 20 cm (wide) x 18 cm (high)
1 Interior fabric 20 cm (wide) x 18 cm (high)
2 x fabric strips (bias tape) 12 cm x 6 cm
1 x fabric strip (pocket for metal strip) 18 cm x 5 cm
2 x rubber band (thickness 5 mm) 30 cm long
1 x metal strip to stabilize the mask over the nose
(e.g. from a folder or filing strip)
1 heart label or your own logo on a woven clothing label
Accessories
Sewing machine
Scissors
Pins or clamps
Safety pins
Instructions:
Step 1:
Cut and iron all fabric pieces according to the instructions.
Step 2:
Edging left and right (bias binding):
Fold the two fabric strips (12 x 6 cm) lengthwise in the middle (left to left) and iron. Lay them apart and fold the outer edges (top and bottom) 1 cm towards the middle and iron again. On one short side, fold in the edge also approx. 0.5 cm and iron. Do the same with both fabric strips.
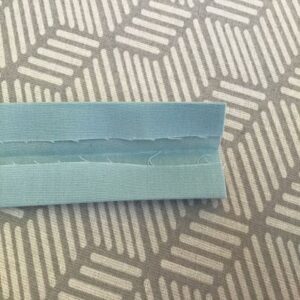
iron the bias binding
Step 3:
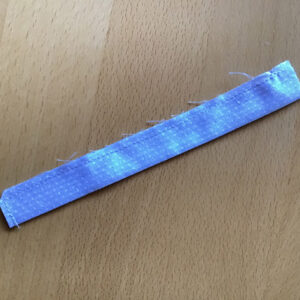
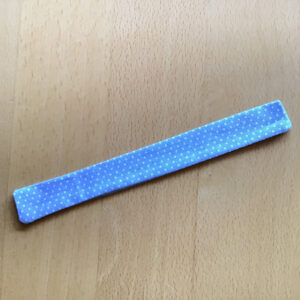
Sew fabric pocket for the metal strip. Cotton fabric 18 x 5cm. The metal strip will later be placed in the pocket for better fixation of the mouth mask.
Fold the strip lengthwise right sides together and iron. Close the open long side and one short side with a straight stitch. Cut the corner back a little and turn the strip over with the help of a chopstick. For a neat finish, lay the fabric on the open short side approx. 0.5 cm inwards
Step 4:
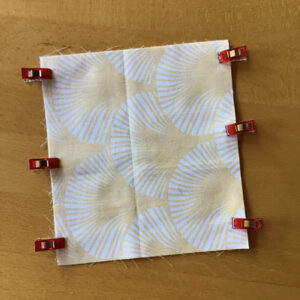
Lay the fabric right sides together and topstitch the opposite long sides with a straight stitch. Then turn the sewing piece over.
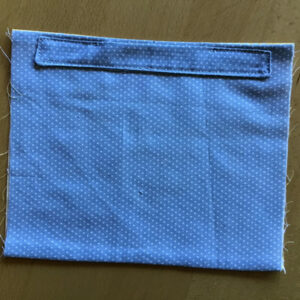
Step 5:
Sew the strip of fabric in the centre of the inside of the fabric with approx. 3 mm distance to the upper edge. An opening remains in the upper middle of the strip, i.e. the seam starts at the top right 4 cm to the right of the corner and ends 4 cm to the top left after the corner.
Step 6:
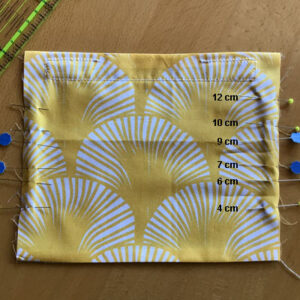
Wrinkle on the front of the mouth mask.
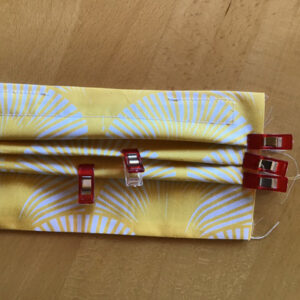
Set markings on the front of the mouth mask on the right and left side using pins. From below at 4 cm, 6 cm, 7 cm, 9 cm, 10 cm and 12 cm. It is helpful to always use two identical needles alternately from below. Proceed in the same way on both sides. Now place needle 2 on needle one so that a fold is created. Fix it with a clamp right and left. Place needle 4 on needle 3 and fix it with a clamp. Needle 6 is placed on needle 5. Fix again. The pleats lie downwards. Sew the right and the left side with 1 cm seam allowance.
Step 7:
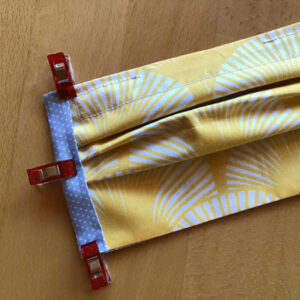
Fix the prepared bias tape right and left. Fold in the still open side and sew it in with a narrow edge. Leave the top and bottom open. If necessary, place a woven label heart in the seam and sew it in, too.
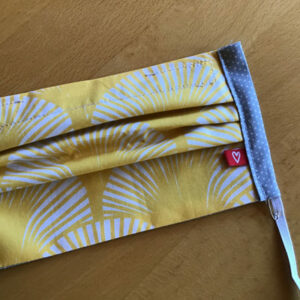
A woven label with your own logo is a great idea if you want to personalize your mouth mask or if you wnat to offer it for sale.
Step 8:
Using a safety pin, pull the elastic through the openings of the bias tape.
Step 9:
Fix the rubber band in advance with safety pins to test the size. Then sew and cut off the excess. Pull the seam of the rubber band into the tunnel. Put the flexible metal strip or a wire into the sewn-on pocket to fix the mouth mask over the nose.